この記事では、JavaScriptの基礎を学んだ方を対象に、クリックでランダムな色を表示するアプリの作り方を解説します。
コードの流れを確認しながら、仕組みを理解していきましょう。
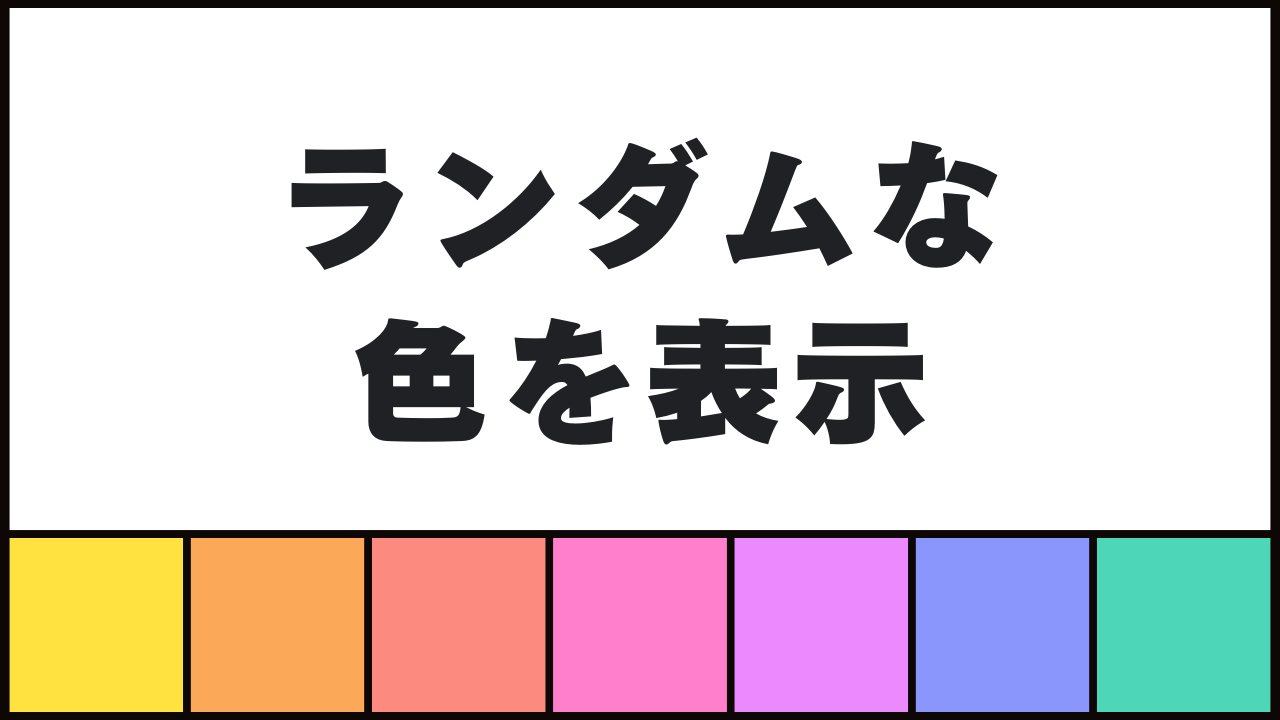
アプリの完成形をチェック
スタートボタンを押すとアニメーションが始まり、終了すると色の名前が表示されると同時に背景色がその色に変わります。
リセットボタンを押すと、最初の状態に戻ります。
ここからは、実際にコードを書いていきましょう。
HTML・CSS・JavaScriptの3つに分けて紹介します。
HTML
<div class="wrap">
  <div id="container" class="container">
    <h1>ランダムな色を表示</h1>
    <div id="resultArea" class="resultArea">
      <p id="resultText" class="resultText">?</p>
    </div>
    <div class="btnArea">
      <button id="startBtn">スタート</button>
      <button id="resetBtn">リセット</button>
    </div>
  </div>
</div>このHTMLは、クリックでランダムな色を表示するアプリの画面構造を作っています。
結果表示エリア
<div id="resultArea" class="resultArea">
  <p id="resultText" class="resultText">?</p>
</div>
- ランダムで選ばれた色が表示される場所です。
resultTextの<p>内に色の名前が表示されます。- 初期状態では「?」が表示されます。
ボタンエリア
<div class="btnArea">
  <button id="startBtn">スタート</button>
  <button id="resetBtn">リセット</button>
</div>
- 「スタート」ボタン:クリックするとランダム表示のアニメーションが始まります。
- 「リセット」ボタン:クリックすると最初の状態に戻ります。
CSS
* {
  margin: 0;
  padding: 0;
  box-sizing: border-box;
}

.wrap {
  width: 100%;
  max-width: 500px;
  height: 500px;
  margin: 0 auto;
  font-size: 18px;
}

.container {
  width: 100%;
  height: 100%;
  padding: 20px;
  text-align: center;
  opacity: 0;
  transition: opacity 0.5s;
}
.container.show {
  opacity: 1;
}

h1 {
  margin-bottom: 30px;
  font-weight: 400;
  font-size: 1.6em;
}

.resultArea {
  width: 100%;
  height: 260px;
  margin: 0 auto;
  border: 1px solid #999;
  border-radius: 5px;
  box-shadow: 2px 2px 4px #999;
  display: flex;
  justify-content: center;
  align-items: center;
}
.resultArea.anime {
  animation: colorChange 0.5s ease 4;
}

.resultText {
  font-size: 2.4em;
  width: 80%;
  height: 120px;
  line-height: 120px;
  background-color: #fff;
  border-radius: 5px;
  box-shadow: inset 0 0 10px rgba(0,0,0,0.3);
}
.resultText.anime {
  animation: scaleChange 2s ease forwards;
}

.btnArea {
  margin-top: 30px;
}
button {
  width: 80%;
  padding: 10px;
  font-size: 24px;
  cursor: pointer;
  background-color: #333;
  color: white;
  border: none;
  border-radius: 5px;
  transition: background-color 0.2s;
  pointer-events: none;
}
button:hover {
  background-color: #555;
}
button.show {
  opacity: 1;
  pointer-events: auto;
}
button.hide {
  display: none;
}

@keyframes colorChange {
  0% { background-color: white; }
  10% { background-color: red; }
  20% { background-color: blue; }
  30% { background-color: green; }
  40% { background-color: yellow; }
  50% { background-color: purple; }
  60% { background-color: orange; }
  70% { background-color: pink; }
  80% { background-color: brown; }
  90% { background-color: aqua; }
  100% { background-color: black; }
}

@keyframes scaleChange {
  0% { transform: scale(1); }
  30%, 70% { transform: scale(0); }
  100% { transform: scale(1); }
}
このCSSは、クリックでランダムな色を表示するアプリの見た目とアニメーションを設定しています。簡単に解説します。
1. 全体のリセット
* {
  margin: 0;
  padding: 0;
  box-sizing: border-box;
}
- ブラウザのデフォルトスタイルをリセットして、余白やサイズ計算を統一します。
2. 外側ラッパー
.wrap {
  width: 100%;
  max-width: 500px;
  height: 500px;
  margin: 0 auto;
  font-size: 18px;
}
- ページ全体の幅を制限し、中央に配置。
- 基本の文字サイズも指定。
3. アプリ本体のコンテナ
.container {
  width: 100%;
  height: 100%;
  padding: 20px;
  text-align: center;
  opacity: 0;
  transition: opacity 0.5s;
}
.container.show {
  opacity: 1;
}
- アプリ全体を囲むコンテナ。
- 初期は透明(
opacity: 0)で、showクラスを付けるとフェードイン。
4. 見出し
h1 {
  margin-bottom: 30px;
  font-weight: 400;
  font-size: 1.6em;
}
- ページタイトルのスタイル。
5. 結果表示エリア
.resultArea {
  width: 100%;
  height: 260px;
  margin: 0 auto;
  border: 1px solid #999;
  border-radius: 5px;
  box-shadow: 2px 2px 4px #999;
  display: flex;
  justify-content: center;
  align-items: center;
}
.resultArea.anime {
  animation: colorChange 0.5s ease 4;
}
- ランダムな色を表示するボックス。
.animeクラスが付くと、色が切り替わるアニメーションを再生。
6. 色の名前表示
.resultText {
  font-size: 2.4em;
  width: 80%;
  height: 120px;
  line-height: 120px;
  background-color: #fff;
  border-radius: 5px;
  box-shadow: inset 0 0 10px rgba(0,0,0,0.3);
}
.resultText.anime {
  animation: scaleChange 2s ease forwards;
}
- 色の名前を表示する
<p>のスタイル。 .animeクラスで縮小→拡大するアニメーション。
7. ボタン
button {
  width: 80%;
  padding: 10px;
  font-size: 24px;
  cursor: pointer;
  background-color: #333;
  color: white;
  border: none;
  border-radius: 5px;
  transition: background-color 0.2s;
  pointer-events: none;
}
button:hover {
  background-color: #555;
}
button.show {
  opacity: 1;
  pointer-events: auto;
}
button.hide {
  display: none;
}
- 「スタート」「リセット」ボタンの共通スタイル。
.show→ 押せる状態、.hide→ 非表示。pointer-events: noneで初期はクリックできない。
8. アニメーション
@keyframes colorChange {
  0% { background-color: white; }
  10% { background-color: red; }
  20% { background-color: blue; }
  30% { background-color: green; }
  40% { background-color: yellow; }
  50% { background-color: purple; }
  60% { background-color: orange; }
  70% { background-color: pink; }
  80% { background-color: brown; }
  90% { background-color: aqua; }
  100% { background-color: black; }
}
- 結果表示ボックスの背景色を順番に変える。
@keyframes scaleChange {
  0% { transform: scale(1); }
  30%, 70% { transform: scale(0); }
  100% { transform: scale(1); }
}
- 色名
<p>が一度縮小して元に戻る拡大アニメーション。
CSSアニメーションについて詳しく解説しています👇
JavaScript
const container = document.querySelector('#container');
const resultArea = document.querySelector('#resultArea');
const resultText = document.querySelector('#resultText');
const startBtn = document.querySelector('#startBtn');
const resetBtn = document.querySelector('#resetBtn');

const colors = [
  { color: 'red', displayColorName: '赤' },
  { color: 'blue', displayColorName: '青' },
  { color: 'green', displayColorName: '緑' },
  { color: 'yellow', displayColorName: '黄色' },
  { color: 'purple', displayColorName: '紫' },
  { color: 'orange', displayColorName: 'オレンジ' },
  { color: 'pink', displayColorName: 'ピンク' },
  { color: 'brown', displayColorName: '茶色' },
  { color: 'aqua', displayColorName: '水色' },
  { color: 'black', displayColorName: '黒' },
];

document.addEventListener('DOMContentLoaded', () => {
  container.classList.add('show');
  startBtn.classList.add('show');
  resetBtn.classList.add('hide');
});

function removeAndAddClass(el, removeClassName, addClassName) {
  el.classList.remove(removeClassName);
  setTimeout(() => {
    el.classList.add(addClassName);
  }, 50);
}

function showResult() {
  resultArea.classList.add('anime');
  resultText.classList.add('anime');
  resultText.textContent = '';
  removeAndAddClass(startBtn, 'show', 'hide');
  setTimeout(() => {
    removeAndAddClass(resetBtn, 'hide', 'show');
  }, 3000);
}

startBtn.addEventListener('click', () => {
  showResult();
  let i = Math.floor(Math.random() * colors.length);
  let resultColor = colors[i].color;
  setTimeout(() => {
    resultArea.style.backgroundColor = resultColor;
    setTimeout(() => {
      resultText.textContent = colors[i].displayColorName;
    }, 500);
  }, 2000);
});

function appReset() {
  container.classList.remove('show');
  setTimeout(() => {
    container.classList.add('show');
    removeAndAddClass(startBtn, 'hide', 'show');
    removeAndAddClass(resetBtn, 'show', 'hide');
    resultArea.className = 'resultArea';
    resultArea.removeAttribute('style');
    resultText.classList.remove('anime');
    resultText.textContent = '?';
  }, 500);
}

resetBtn.addEventListener('click', appReset);
このJavaScriptは、クリックでランダムな色を表示するアプリの動作を制御しています。順を追って丁寧に解説します。
1. 要素の取得
const container = document.querySelector('#container');
const resultArea = document.querySelector('#resultArea');
const resultText = document.querySelector('#resultText');
const startBtn = document.querySelector('#startBtn');
const resetBtn = document.querySelector('#resetBtn');
- HTMLのIDで要素を取得しています。
- これにより、アニメーションやテキスト変更、ボタンの表示切替を操作できます。
2. 色データの定義
const colors = [
  { color: 'red', displayColorName: '赤' },
  { color: 'blue', displayColorName: '青' },
  { color: 'green', displayColorName: '緑' },
  { color: 'yellow', displayColorName: '黄色' },
  { color: 'purple', displayColorName: '紫' },
  { color: 'orange', displayColorName: 'オレンジ' },
  { color: 'pink', displayColorName: 'ピンク' },
  { color: 'brown', displayColorName: '茶色' },
  { color: 'aqua', displayColorName: '水色' },
  { color: 'black', displayColorName: '黒' },
];- ランダム表示する色と日本語名をオブジェクトでまとめています。
color→ 背景色、displayColorName→ 表示文字。
3. ページ読み込み時の初期表示
document.addEventListener('DOMContentLoaded', () => {
  container.classList.add('show');
  startBtn.classList.add('show');
  resetBtn.classList.add('hide');
});
- ページが読み込まれたら
containerをフェードイン表示 - スタートボタンは表示 (
.show) - リセットボタンは非表示 (
.hide)
4. クラス切り替え用の関数
function removeAndAddClass(el, removeClassName, addClassName) {
  el.classList.remove(removeClassName);
  setTimeout(() => {
    el.classList.add(addClassName);
  }, 50);
}
- 一度クラスを削除してから別のクラスを追加する関数。
- アニメーションや表示切替のタイミング調整に使用。
関数の定義方法について解説しています👇
5. 結果表示のアニメーション
function showResult() {
  resultArea.classList.add('anime');
  resultText.classList.add('anime');
  resultText.textContent = '';
  removeAndAddClass(startBtn, 'show', 'hide');
  setTimeout(() => {
    removeAndAddClass(resetBtn, 'hide', 'show');
  }, 3000);
}
- 結果エリアと文字に
.animeを付けてアニメーション開始 - スタートボタンを非表示に
- 3秒後にリセットボタンを表示
6. スタートボタンのクリック処理
startBtn.addEventListener('click', () => {
  showResult();
  let i = Math.floor(Math.random() * colors.length);
  let resultColor = colors[i].color;
  setTimeout(() => {
    resultArea.style.backgroundColor = resultColor;
    setTimeout(() => {
      resultText.textContent = colors[i].displayColorName;
    }, 500);
  }, 2000);
});
- ボタンを押すと
showResult()でアニメーション開始 - ランダムに1色を選択
- 2秒後に背景色変更、さらに0.5秒後に色の名前を表示
Math.random() について詳しく解説しています👇
7. リセット処理
function appReset() {
  container.classList.remove('show');
  setTimeout(() => {
    container.classList.add('show');
    removeAndAddClass(startBtn, 'hide', 'show');
    removeAndAddClass(resetBtn, 'show', 'hide');
    resultArea.className = 'resultArea';
    resultArea.removeAttribute('style');
    resultText.classList.remove('anime');
    resultText.textContent = '?';
  }, 500);
}

resetBtn.addEventListener('click', appReset);
- リセットボタンで元の状態に戻す処理
- スタートボタンを表示、リセットボタンを非表示
resultAreaのスタイルとクラスを元に戻し、resultTextを「?」に戻す
8. まとめ
- HTMLのID要素を取得 → 操作対象を指定
- 色データ配列でランダム表示管理
- アニメーションはクラス切替で制御
- スタート・リセットボタンの表示切替もクラス操作
- タイマー (
setTimeout) でアニメーションのタイミングと表示を調整
このJSだけで、スタート→アニメーション→色表示→リセット の一連の動作を実現しています。